![pglogo2x png-1.png]](https://help.populusgroup.com/hs-fs/hubfs/pglogo2x%20png-1.png?height=50&name=pglogo2x%20png-1.png)
Jump to:
Time Entry
Step-by-step Guide
Register and access your Timesheet at Bullhorn Time and Expense
1. Go to https://sl2-www.bte.bullhornstaffing.com
Hint: It is the letter l between s and 2 (sl2)
You can access and enter time from your phone. Open a browser and enter the URL or click a link from an email.
2. Click Register to create your account
Enter your email.
Create your password (must be at least 8 characters)

3. Update Your Profile Settings
- Complete General Settings
- Enter your Full First and Last Legal Name
- If you have a hyphenated last name, please use the full version.
- Enter your pin. This is the last four digits of your SSN if provided. If not, please use 9999.

- Contact Preferences
- Preference defaults to Email.
- Confirm Notification Settings
- You will receive emails when your submitted time is adjusted (rejected) or approved
- The Time off option is not used

-
- Leave all the values in the Application Settings section the same
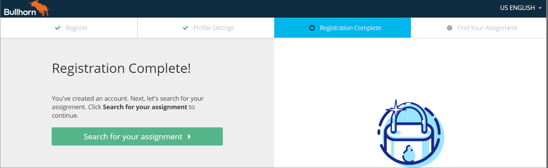
5. Click Search for your assignment
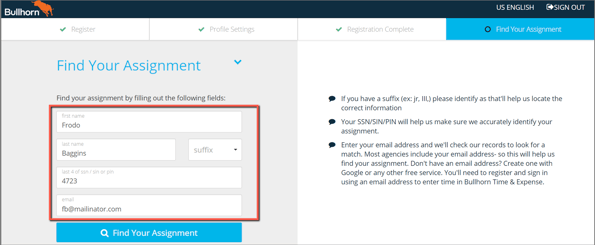
6. The search data is pre-populated from your account. Just click Find Your Assignment
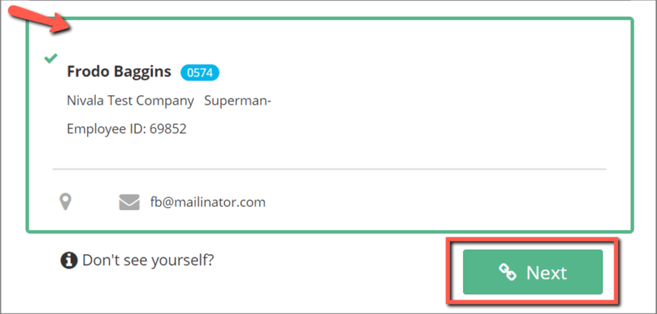
7. Your active assignments are displayed on the right of the screen. Generally, there will be only one assignment. Click the assignment (a green border appears), then click Next.
8. Your available Timesheet weeks are displayed on the Dashboard
- Generally, there will be only one week available for time entry
- If expenses are expected for the assignment, the Expenses tab is visible
- Click the Week Ending link to enter time
- For online material about entering time and learning about Bullhorn Time and Expense, click Help

Entering Your Weekly Time
Enter and submit your timesheet by the last day you work in the week (typically Friday, but it may vary if you work weekends). Log into Bullhorn Time and Expense using your email and the password you created when you registered.
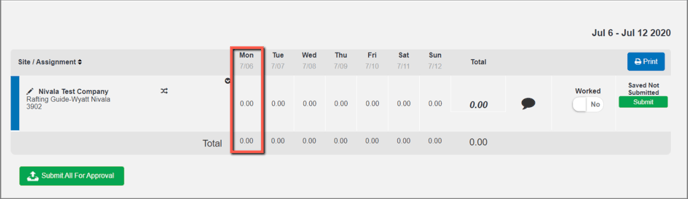
- On the Dashboard, click the Week Ending date (link) to enter time. Typically you will see only one or two weeks available

- Click the 0.00 for the appropriate day to enter time and or expenses
3. The entry screen displays. For Time Reporting Code Regular, enter your In (start) and Out (end) times.
- Enter the Out and In time for your break/meal
- To record additional breaks, click +Meal and enter additional Out/In times
- If you do not have the +Meal option, please find additional instructions on entering your meal breaks below.
- Use Copy to Next Day or Copy Through Friday to apply what you entered to new days
- Click OK when complete
4. Repeat these steps as necessary for the days you worked (where not copied from your initial entry)
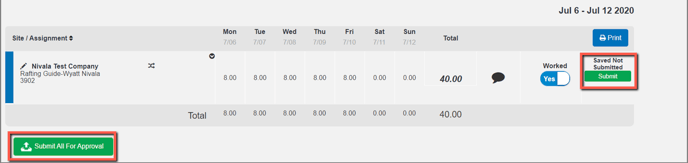
5. As you enter time, the Total is updated. When you are done entering time click Submit or Submit All For Approval.
- If you have Expenses to enter, return to the Dashboard
If you have not submitted your time, email reminders to submit your time will be sent on Fridays. These emails come from donotreply@bte.bullhornstaffing.com.
Expense Entry
Follow the steps below to learn how to submit your Expense Report.
If you have questions about expense policies, reach out to your point of contact before submitting your expense report for approval.
Before You Begin
- Receipt Images must adhere to the following guidelines to upload or email to the receipt bank:
- Acceptable formats: .png, .jpg, .gif, .tif, .pdf
- Maximum size: 4 MB
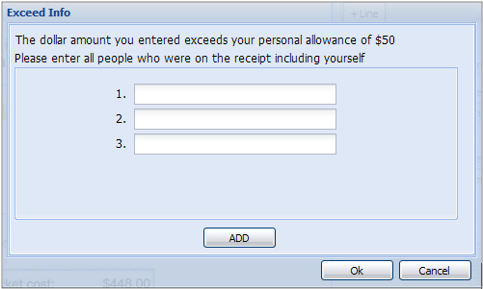
- In some cases, spending thresholds/limitations are set by your employer and may require you to enter additional information with the expense entry. If the allowance is exceeded, a separate pop-up window will appear to include additional information.
- The number of line items displayed in the pop-up is based on the amount of the expense and the spending limit.
Entering Expenses
- Click Expenses in the top menu.
- Note: If the 'Expenses' tab is not available on your timesheet, but you have expenses to submit, contact PG Support (pgsupport@populusgroup.com).
- Upload the receipts you'll need for your report.
-
Click Upload File(s) From Your Computer.
-
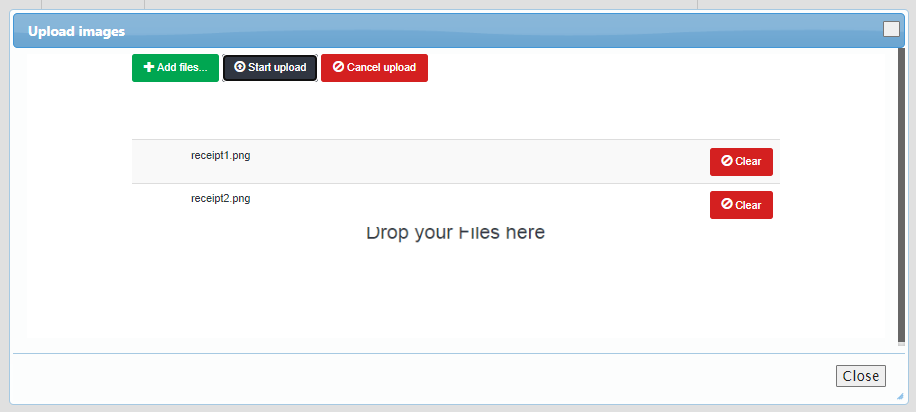
Click the Add files... button to find receipt images on your local hard drive.
-
Double click on the file to add it to the Upload images window.
-
Click Start upload to upload the receipts to the Expense Receipt Bank. Wait until all files are uploaded before closing the upload window.

-
Check the Receipt Bank on the main Expenses screen to confirm receipt images have been uploaded to Bullhorn Time & Expense.
-
- Under Step 3: Start a New Expense Report select the correct week ending date for your expense.
- Click Start a New Report.

- The following is a display of the expense application window that appears after starting a new expense report. The window is split into two panels:

- Left Panel (Expense Image): Shows 1 of x receipts uploaded.
- Right Panel (Expense Entry): Interface used to enter expense items to be linked to the receipt image displayed in the left panel.
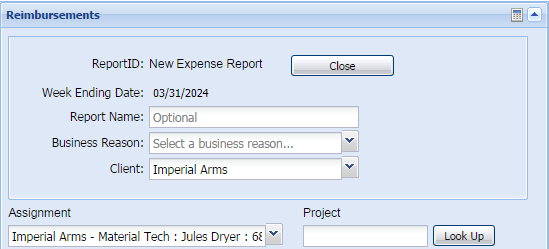
- Enter the following expense details in the top right of your screen under Reimbursements. Do not use any special characters like @, $, &, #, etc.

- Report Name: Enter a unique name for your report (optional).
- Business Reason: Add a business reason for the expense if applicable (optional).
- Client: Select a client from the drop down.
- Assignment: Select the appropriate assignment from the drop down menu.
- Project: Enter the project name or select a previously entered project name by clicking Look Up (optional).
- Ensure the correct receipt image that should be linked to the expense line item is displayed in the left panel. If not, use the navigation arrows at the top of the left panel to move to the correct receipt.
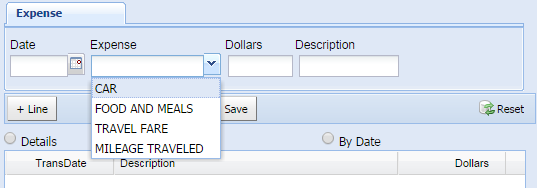
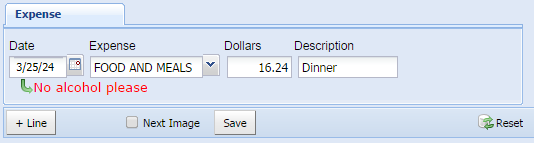
- Fill out the following information under Expense:
- Date: Date of the expense.
- Expense: Pick the applicable expense code from the drop down. The drop down options are specific to your agency.
- When selecting an expense code that involves calculations (e.g. mileage), the expense application automatically calculates the dollar amount after the data is entered.
- Dollars: Enter the amount of the expense.
- Description: Describe the expense.

Additional messages or instructions may appear if special requests, restrictions, or limitations have been set by the client. Follow the instructions displayed when entering an expense.


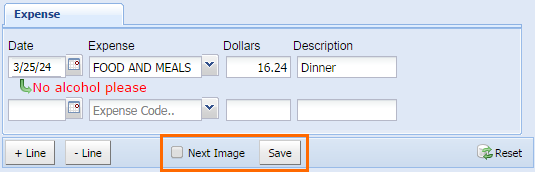
- Click + Line to add a new expense line item. Add lines to represent what is displayed on the left image panel. For example, if you have multiple images displayed on the left, then enter an expense line for each image.
- Select - Line to remove an expense line item.
- Select Reset to clear the data entered.

- When you have finished entering expense items from the receipt image, select the check box Next Image. The next receipt image in the Receipt Bank will be displayed after the expense line item is saved
- Select Save to add the expense item(s) to the report.

- Click Attach the image to the expense report.
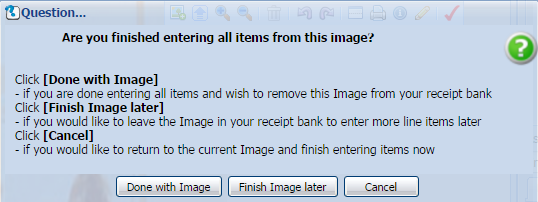
- A new window will pop up. Confirm whether you have finished entering details from the receipt image.

- After responding to the confirmation prompt, the data you entered will be added with other expense entries that appear in the transaction window. The expense total is displayed at the bottom of the transaction window. This amount is automatically updated when an expense is added or deleted.
- To edit an expense that is listed in the transaction window right click on the line item and select one of the following options:
- Detail: View expense details.
- Edit: Modify expense entry.
- Delete: Remove expense entry.
- After all expense items have been entered into the expense report, select Submit for Approval to submit your expense report.
- Select Close to close the expense window and submit the expense report at a later time.


Once the expense report has been submitted, you are no longer able to make changes.
Meal Breaks
Depending on your assignment, how you enter your time worked and account for your meal period will vary. In all cases, you will click the day, then enter the start and end times for when you started and ended work. If there is a ‘Meal’ button, you will use that for meal periods. Both entry formats accurately capture the worked time and your meal break. The system captures the time differently based on behind-the-scenes settings.
Log in to Bullhorn Time and Expense and select the work period. Then follow the appropriate instructions detailed in this document.
Click the day to access your timecard

Enter your time
If you see the Add meal option on your timecard
- Enter your In and Out time for your entire shift
- Then click Add meal and enter the start (Out) and end (In) time of your meal break

In this example, you worked from 8:00 – 5:00 and took your meal break from 12:00 -1:00

If you do not see the Add meal option on your timecard
If there is no Add meal option you will enter two blocks of worked time.
- Enter the start time of your shift as the In time
- Enter the beginning of your meal break as the Out time
- Click Add work to add your second block of work. Enter the end of the meal break as the In
- Enter the Out time as the end time of your shift
In this example, you worked from 8:00 – 12:00 and then took a break. You returned to work at 1:00 and completed the shift at 5:00.
